The short version
Verify your domain with Resend, paste a handful of DNS records into your registrar, wait for propagation, and the monthly report starts arriving from reports@yourdomain.com (or whatever address you choose) instead of from us. Connect once, send forever: you do this once per agency, not once per client.
Why bother
Reports land in your client’s inbox. If the From line says SendTidings, the client wonders who that is, hovers the sender, maybe flags it as spam. If it says you, the report does what it’s meant to do: quietly reinforces that you’re the one delivering the work.
It’s also better for deliverability long-term. Your domain has a sending reputation; ours is shared.
Set up the domain in Resend
Open the Organisation page and find the Domain verification section. (Sender name and reply-to address live just below it, under Email sending.) You’ll land on a flow that asks for the domain you want to send from, usually yourdomain.com or a subdomain like reports.yourdomain.com. A subdomain is the safer choice if you also send transactional or marketing email from the root; it keeps reputations separate.
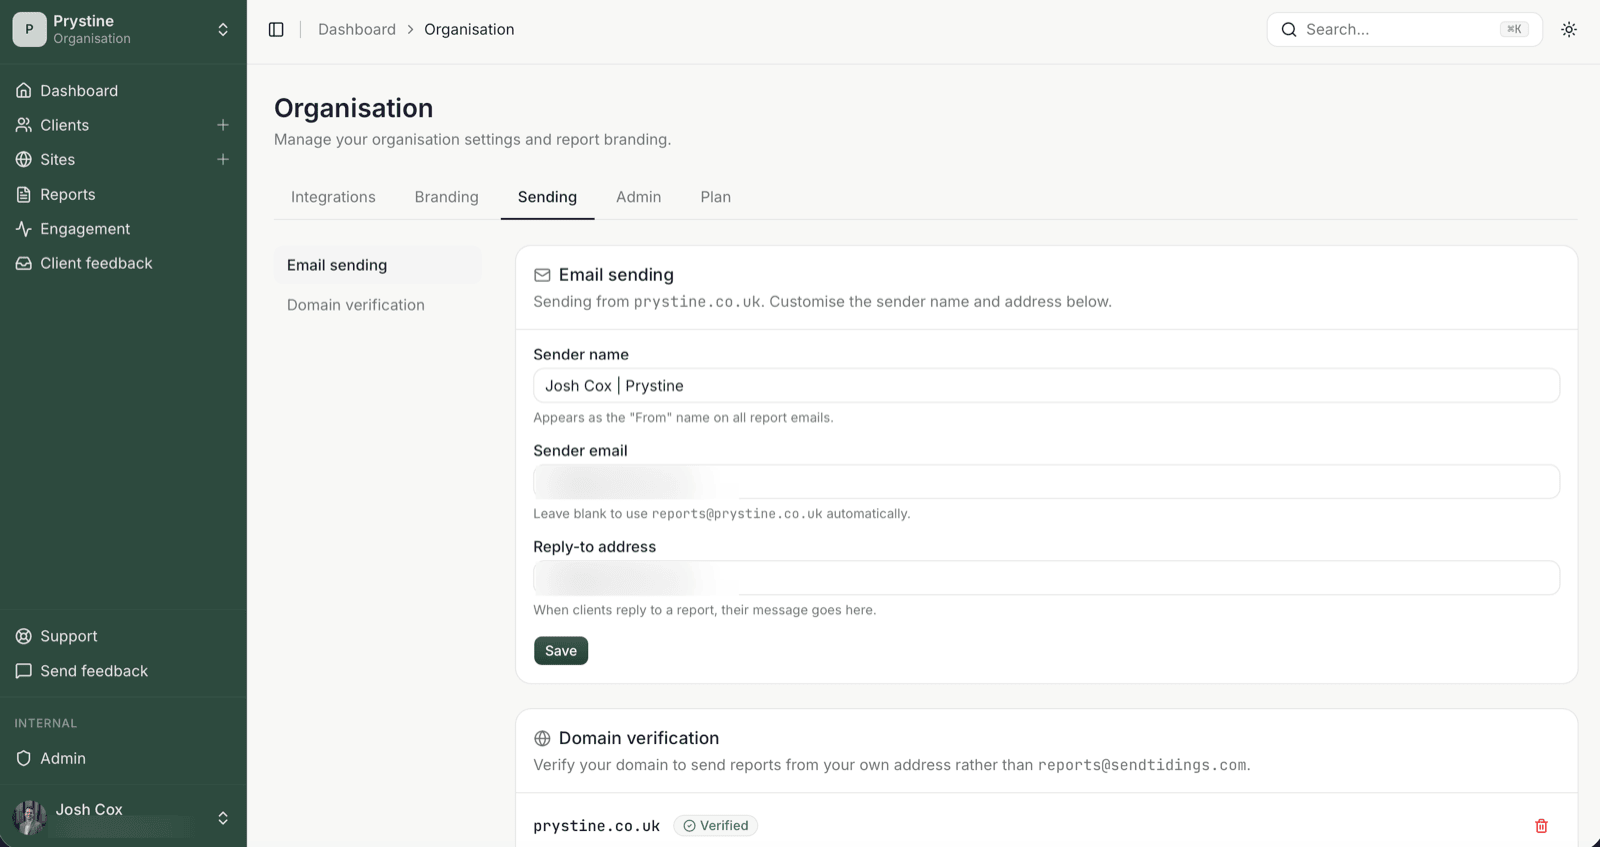
Click Add domain. Resend generates the records you need.
The DNS records
You’ll get four or five entries to add at your registrar (Cloudflare, Namecheap, Route 53, whoever holds the DNS for that domain):
- SPF: a
TXTrecord telling receiving servers Resend is allowed to send for you. If you already have an SPF record, you merge; you don’t add a second one. Two SPF records is worse than none. - DKIM: usually two
CNAMErecords that let receivers verify the report wasn’t tampered with in transit. - DMARC: a
TXTrecord that tells receivers what to do if SPF/DKIM fail. Start withp=noneif you’ve never had DMARC; it’s report-only and won’t break anything. - MX / Return-Path: a record for bounce handling, so we can see if a recipient address is dead.
Copy each one carefully. The most common mistake is pasting an extra space or losing the trailing dot: DNS is unforgiving.
Whilst it propagates
DNS changes can take anywhere from a few minutes to 48 hours, depending on your registrar and TTL settings. In our experience it’s usually under an hour, but plan for longer.
Here’s the honest bit: any report scheduled to send during propagation still goes out from the default SendTidings address. We don’t queue them and hold. If you’ve got reports due tomorrow and you’re verifying today, expect a mixed bag — some from us, some from you, depending on when each one fires versus when Resend confirms the domain.
If that matters for a specific client, turn off that site’s schedule (the site’s Schedule section — toggle off “Send monthly reports automatically”) until the domain shows Verified, then switch it back on. Otherwise let it ride; the next month’s batch will all be branded.
Confirming it worked
Back in Organisation → Domain verification, you’ll see one of three states:
Pending: records not detected yet. Give it longer.Verified: you’re done. The next report goes out from your domain.Failed: usually a typo in one of the records, or an SPF conflict. The panel tells you which record’s the problem.
Send yourself a test once it’s verified: open any site’s report preview and hit Send test — it goes straight to your own inbox. Check the From address and the headers: you want to see your domain in both.
A heads-up on test emails: they don’t create a real reportSend row, so they’re for verifying the From line and rendering only. They won’t show up in history and opens won’t track. For a proper end-to-end check, use Send now with only yourself on the recipient list.
See also: Send test vs Send report